
| 银杏科技有限公司旗下技术文档发布平台 | |||
| 技术支持电话 | 0379-69926675-801 | ||
| 技术支持邮件 | Gingko@vip.163.com | ||
| 版本 | 日期 | 作者 | 修改内容 |
|---|---|---|---|
| V1.0 | 2020-11-12 | yang | 初次建立 |
实验二:LVGL移植
一、实验目的与意义
- 在iCore4T +RT-Thread工程的基础上移植LVGL图形库。
二、实验设备及平台
- iCore4T 双核心板
- iCore4T 扩展底板
- iCore 4.3寸触摸屏底板
- 4.3寸电容触摸屏
- JLINK(或相同功能)仿真器
- Micro USB线缆
- Keil MDK 开发平台
- STM32CubeMX开发平台
- 装有WIN XP(及更高版本)系统的计算机
三、RT-Thread与LVGL
RT-Thread官方提供了LittlevGL2RTT软件包,在menuconfig中勾选RT-Thread online packages → system packages → LittlevGL2RTT,使用命令scons –target=mdk5重新编译,即可将LittlevGL2RTT添加到工程中。
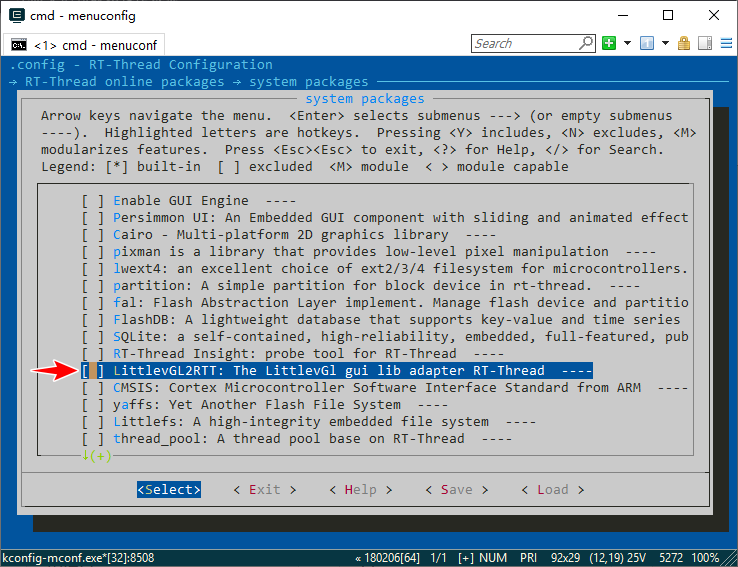
不过RT-Thread官方LittlevGL2RTT软件包版本为v5.3版,LVGL更新比较快,已经更新到v7.4版,并且较旧版的函数接口有非常大的改变,因此我们不用官方软件包。 在Github上有一个LVGL2RTT项目使用的是v7版的LVGL,我将参考他来进行移植。
四、LVGL移植
- 4.1、下载源码
下载LVGL2RTT源码放在stm32h750-gingko-icore4t\paskages目录下,在目录stm32h750-gingko-icore4t下的.config文件中添加LVGL2RTT选项。
Github地址:https://github.com/orange2348/LVGL2RTT
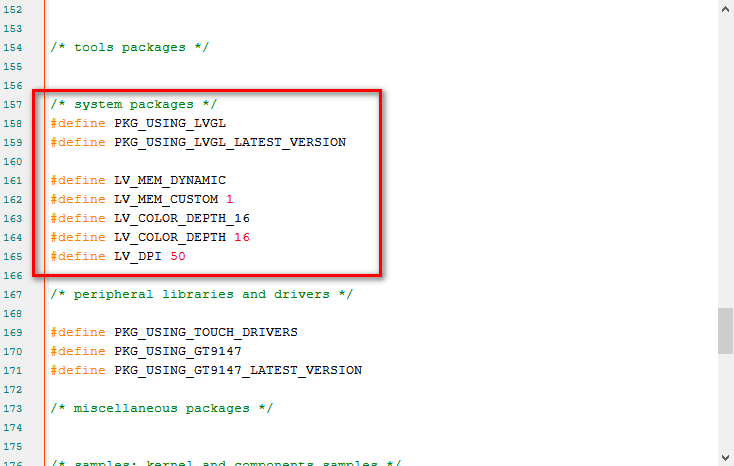
 在rtconfig.中添加内容。
 进入stm32h750-gingko-icore4t文件夹下,右击空白处,选择ConEmu Here,使用scons命令,键入scons –target=mdk5,生成MDK5工程。
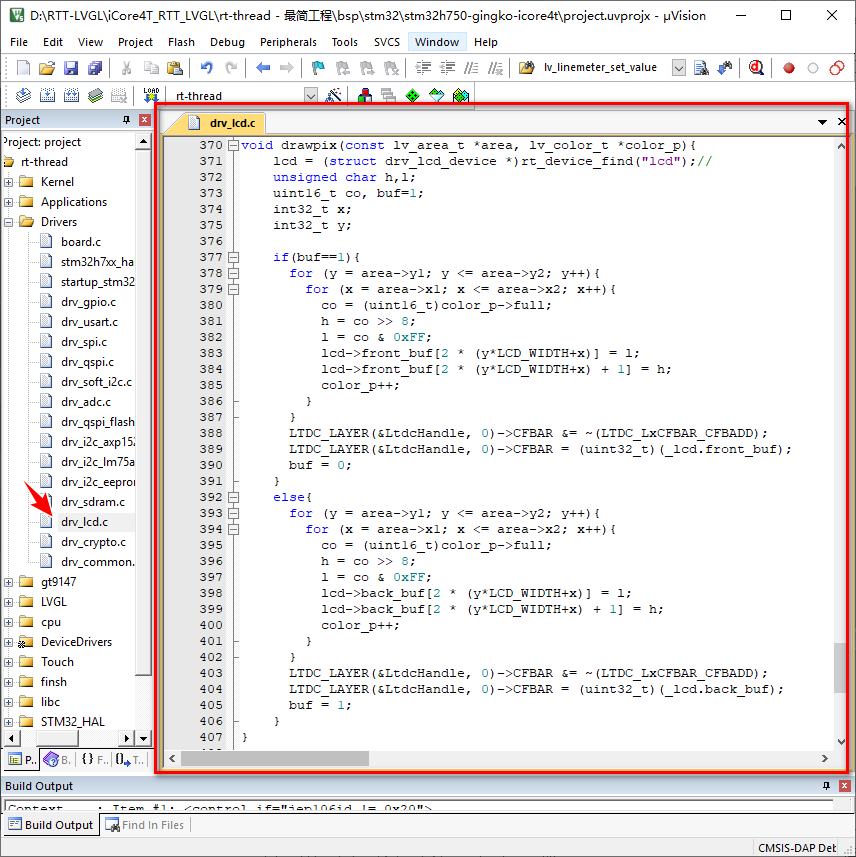
- 4.2、配置显示接口
打开MDK5工程,首先在Drivers/drv_lcd.c中添加画点函数。
 在LVGL\lv_port_disp.c文件中修改disp_flush函数。

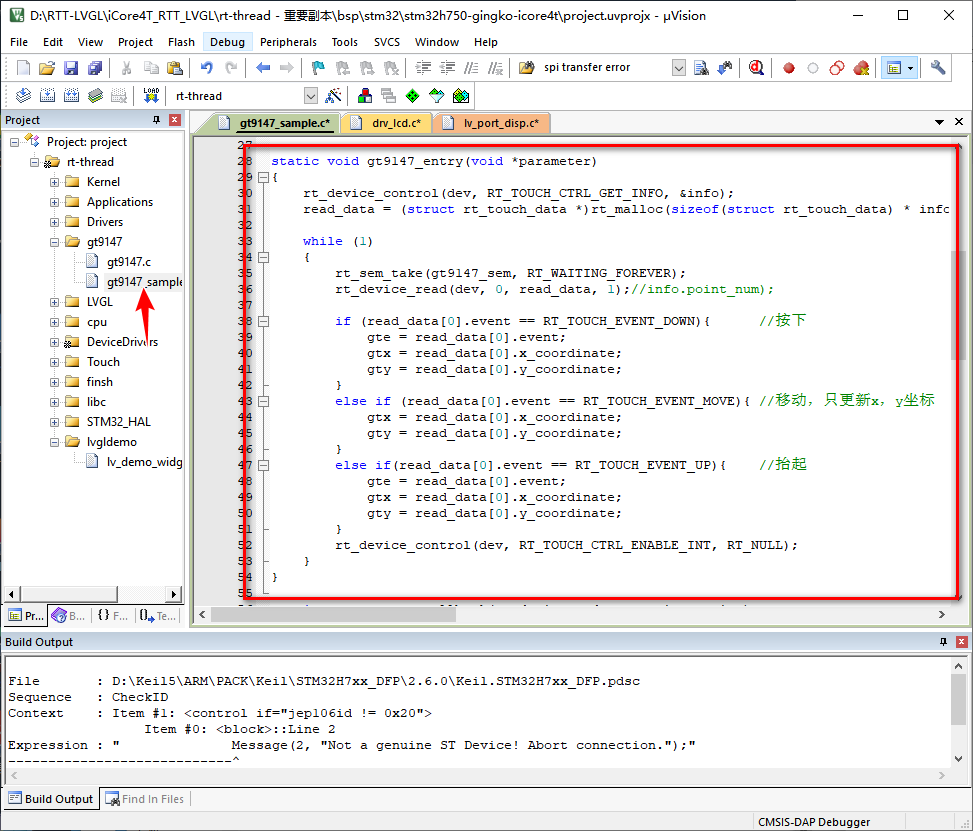
- 4.3、配置触摸接口
更改gt9147_sample.c中的触摸中断函数。
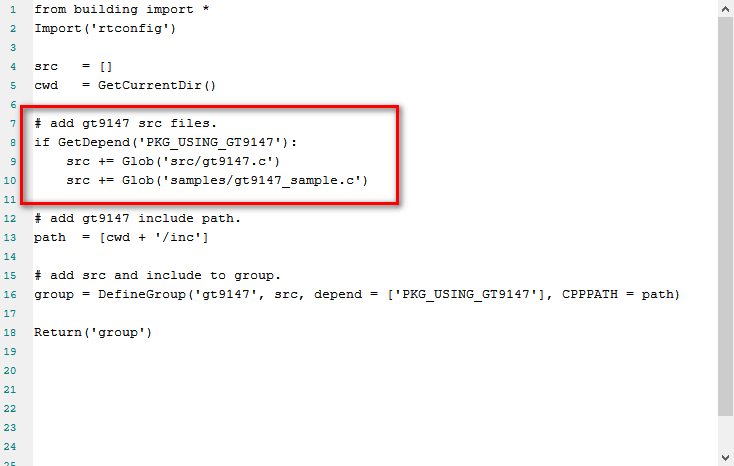
 修改packages\gt9147-latest下SConscript内容如下。
 将lvgl\examples\porting目录下的lv_port_indev_template.c复制更名为lv_port_indev.c,并添加近工程LVGL组。将lv_port_indev_template.h复制更名为lv_port_indev.h。
 将触摸接口模板文件函数修改如下。
/**********************
 *   GLOBAL FUNCTIONS
 **********************/
void lv_port_indev_init(void)
{
    lv_indev_drv_t indev_drv;
    /*------------------
     * Touchpad
     * -----------------*/
    /*Initialize your touchpad if you have*/
    touchpad_init();

    /*Register a touchpad input device*/
    lv_indev_drv_init(&indev_drv);
    indev_drv.type = LV_INDEV_TYPE_POINTER;
    indev_drv.read_cb = touchpad_read;
    indev_touchpad = lv_indev_drv_register(&indev_drv);
}
/**********************
 *   STATIC FUNCTIONS
 **********************/
/*------------------
 * Touchpad
 * -----------------*/
/*Initialize your touchpad*/
static void touchpad_init(void)
{
    /*Your code comes here*/
    gt9147_sample("gt9147",480,272); //开启电容触摸中断
}
/* Will be called by the library to read the touchpad */
static bool touchpad_read(lv_indev_drv_t * indev_drv, lv_indev_data_t * data)
{
    static lv_coord_t last_x = 0;
    static lv_coord_t last_y = 0;
    /*Save the pressed coordinates and the state*/
    if(touchpad_is_pressed()) {
        touchpad_get_xy(&last_x, &last_y);
        data->state = LV_INDEV_STATE_PR;
    } else {
        data->state = LV_INDEV_STATE_REL;
    }
    /*Set the last pressed coordinates*/
    data->point.x = last_x;
    data->point.y = last_y;
    /*Return `false` because we are not buffering and no more data to read*/
    return false;
}
/*Return true is the touchpad is pressed*/
static bool touchpad_is_pressed(void)
{
    if(gte == RT_TOUCH_EVENT_DOWN)return true;
        return false;
}

/*Get the x and y coordinates if the touchpad is pressed*/
static void touchpad_get_xy(lv_coord_t * x, lv_coord_t * y)
{
    (*x) = gtx;
    (*y) = gty;
}
- 4.4、添加官方示例
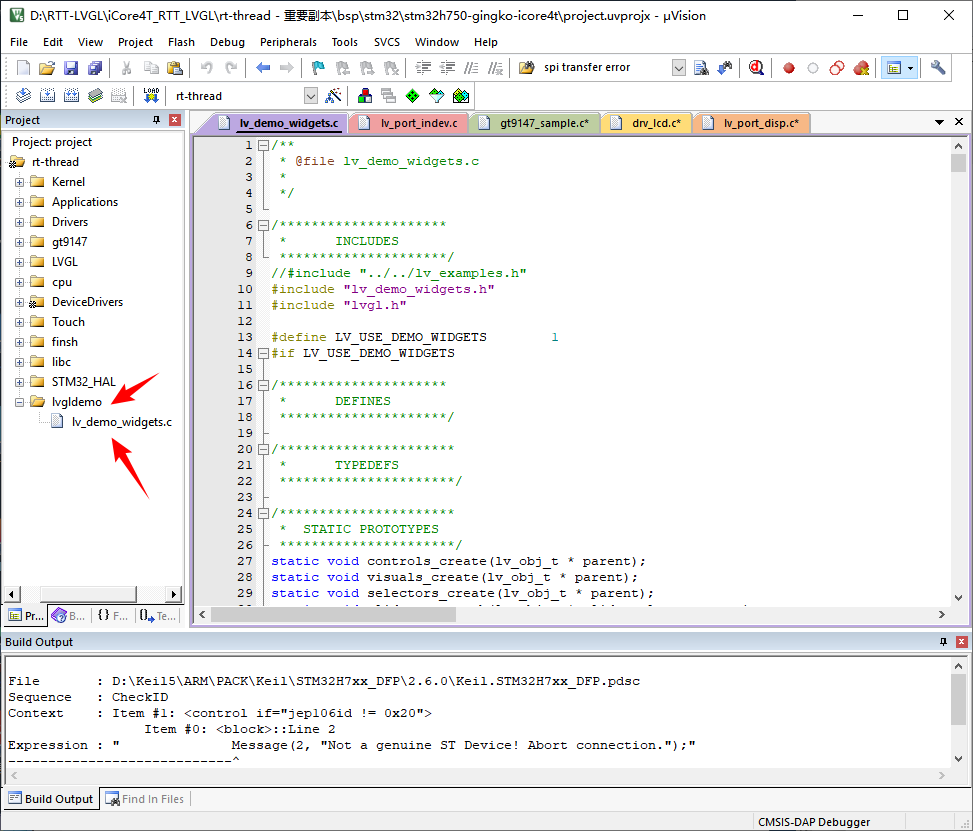
在MDK工程中新建组lvgldemo,并将packages\LVGL2RTT-master\lv_examples下的lv_demo_widgets.c添加进来。
- 4.5、编译下载
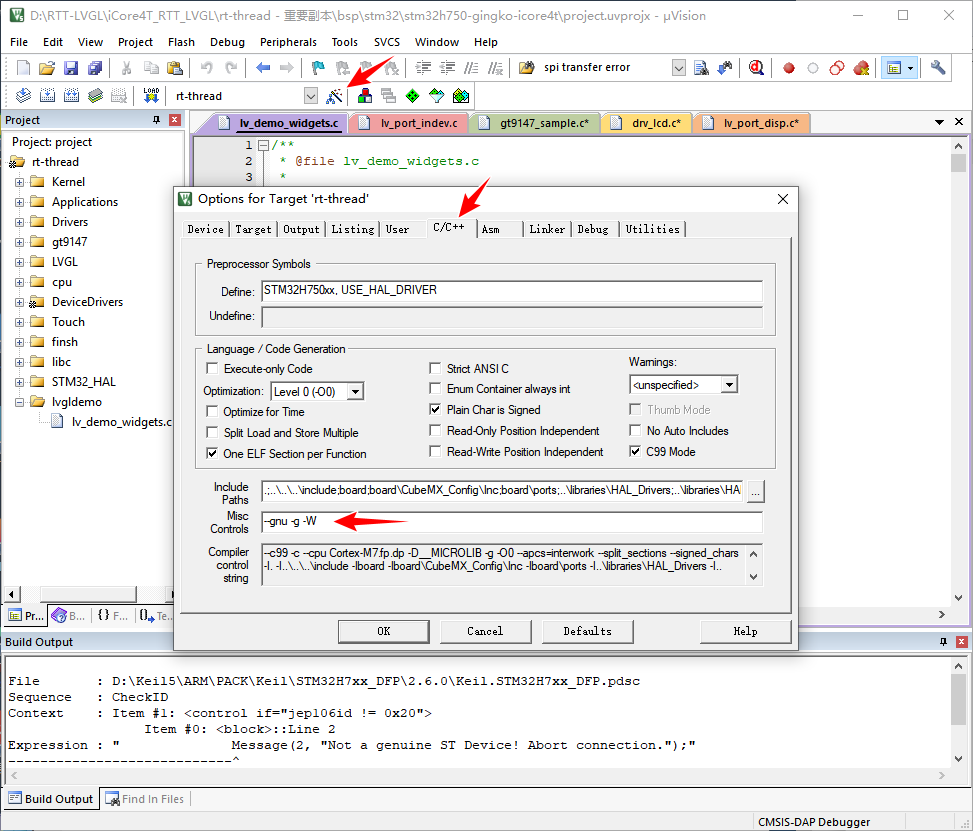
因为LittlevGL使用了匿名结构体, 所以需要在MDK中需要添加编译参数: –gnu -g -W.
 添加LVGL后,程序大小超过STM32H750标定的128k,不过实测STM32H750RAM大小为2M,可以参照下面的帖子将RAM大小更改到2M,然后编译工程,下载验证。
https://bbs.21ic.com/icview-3039900-1-1.html

- 4.6、运行程序
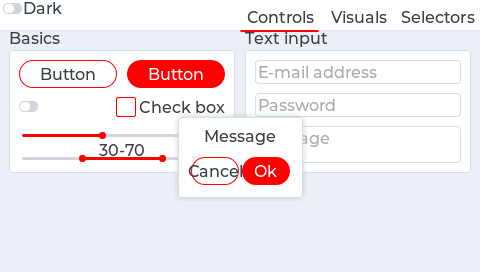
官方示例效果如下:
 至此,iCore4T_RTT_LVGL工程构建完毕。本节代码包中有官方示例、最简工程两个工程,之后的例程都以最简工程为基础进行演示。
